
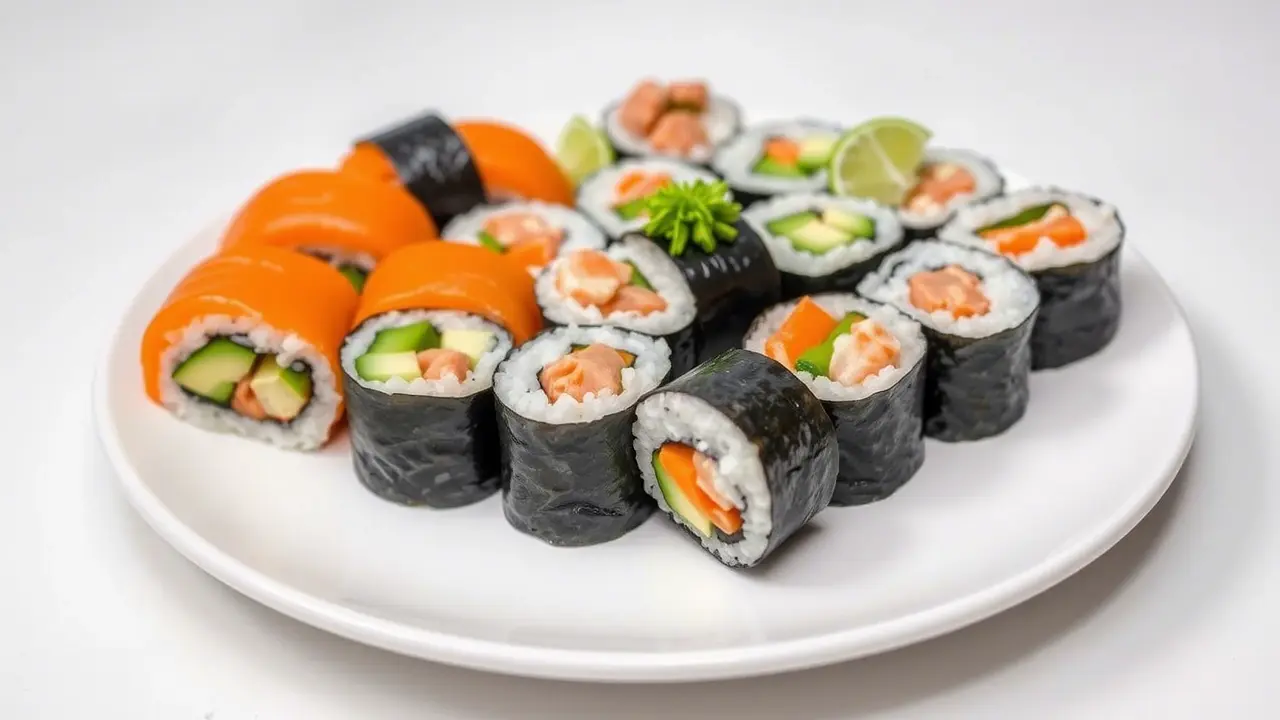
Craving sushi but looking for a low-sodium alternative that doesn’t compromise on flavor? Making your own low-sodium sushi at home lets you enjoy fresh, delicious rolls while controlling ingredients to fit your dietary needs. Whether you’re reducing salt for health reasons or just want a cleaner, more natural taste, this recipe delivers all the umami goodness without the extra sodium. With simple swaps and fresh ingredients, you’ll create sushi that’s just as satisfying as restaurant-quality rolls—without the guilt. Ready to roll? Let’s dive in!
Key Benefits of Making Low-Sodium Sushi at Home
Making low-sodium sushi at home isn’t just about reducing salt—it’s about creating a fresh, flavorful, and healthier alternative to store-bought or restaurant sushi. Here’s why you’ll love this homemade version:
1. Full Control Over Ingredients
Many pre-made sushi options contain hidden sodium in soy sauce, rice seasoning, and even imitation seafood. By making it yourself, you can choose low-sodium substitutes while still enjoying delicious flavors.
2. Healthier Without Sacrificing Taste
By swapping traditional soy sauce for low-sodium or sodium-free alternatives and using fresh, high-quality ingredients, you get all the umami flavors with less sodium intake, making it a heart-friendly option.
3. Budget-Friendly and Customizable
Sushi can be expensive when dining out. Making it at home allows you to customize your rolls with your favorite fillings-whether it’s fresh fish, crisp vegetables, or creamy avocado-while saving money.
4. Fun and Easy to Make
Rolling sushi might seem intimidating, but with the right technique and a little practice, it becomes an enjoyable and rewarding experience. Plus, it’s a great interactive meal for family dinners or date nights!
By following this low-sodium sushi recipe, you’ll enjoy all the traditional flavors of sushi without the unnecessary sodium-perfect for those seeking a heart-conscious and flavorful meal. Ready to get started? Let’s dive into the ingredients!
Ingredients for Low-Sodium Sushi
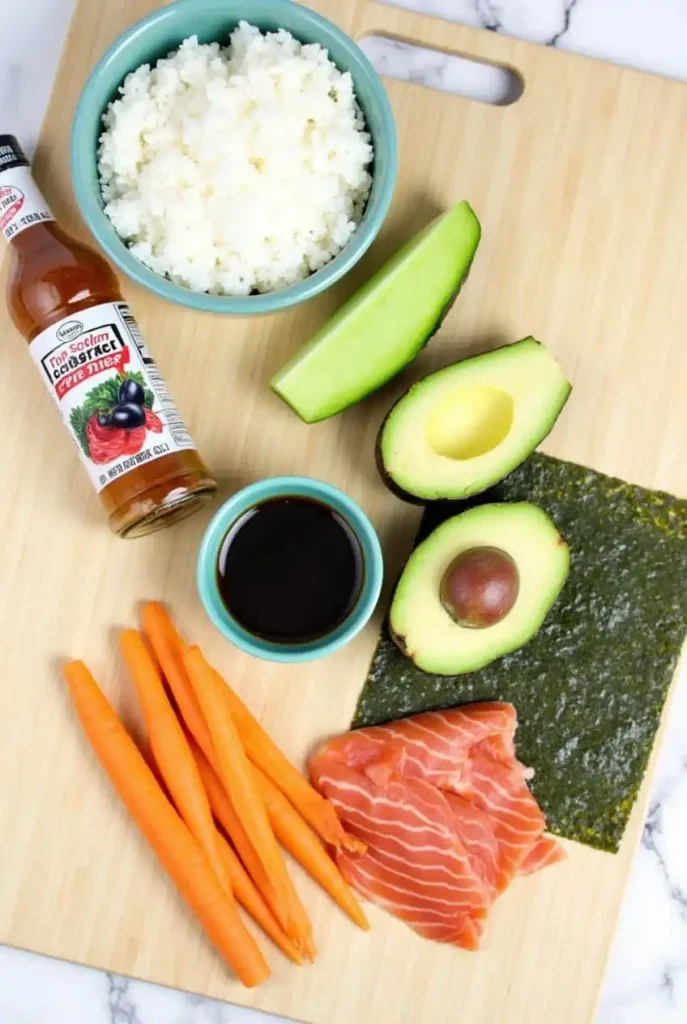
Creating homemade low-sodium sushi starts with selecting fresh, high-quality ingredients while making smart swaps to reduce sodium without sacrificing flavor. Here’s what you’ll need:
For the Sushi Rice:
- 2 cups sushi rice, rinsed thoroughly
- 2 ½ cups water
- 2 tablespoons rice vinegar (unsalted)
- 1 tablespoon sugar
- ½ teaspoon salt substitute (or minimal sea salt)
For the Fillings (Choose Your Favorites):
- 4 oz fresh sushi-grade fish (salmon, tuna, or cooked shrimp)
- ½ avocado, sliced
- ½ cucumber, julienned
- ½ carrot, julienned
- ¼ cup bell peppers, thinly sliced
- 1 tablespoon toasted sesame seeds (unsalted)
- 4 sheets low-sodium nori (seaweed)
For Dipping & Garnish:
- Low-sodium soy sauce or coconut aminos
- Wasabi (optional, check for low-sodium options)
- Pickled ginger (look for low-sodium varieties or make your own)
Ingredient Swaps & Flavor Boosters
- Skip traditional soy sauce: Opt for low-sodium tamari, coconut aminos, or even a homemade soy-free dipping sauce.
- Boost umami naturally: A touch of sesame oil, citrus zest, or fresh herbs can enhance flavor without adding sodium.
- Use fresh fish or plant-based proteins: Instead of imitation crab (which often contains added sodium), use real seafood or tofu for a plant-based alternative.
How to Make Low Sodium Sushi

- Prepare the Rice
- Start by rinsing the sushi rice under cold water until the water runs clear. This removes excess starch, helping the rice stick better without becoming too sticky.
- Cook the rice according to package instructions. Once done, let it cool slightly, but keep it slightly warm for easier rolling.
- For flavor, use low-sodium rice vinegar to season your rice instead of traditional seasoned rice vinegar (which tends to be higher in sodium). Mix a little rice vinegar with a touch of sugar and salt to your taste.
- Prepare the Fillings
- For a healthy, low-sodium option, stick with fresh vegetables like cucumber, avocado, and carrots. These provide natural flavor and crunch.
- Opt for grilled chicken or tofu for the protein, as both options have less sodium compared to traditional raw fish like tuna or salmon.
- For an extra burst of flavor, try using fresh herbs like cilantro or mint for garnish instead of high-sodium soy sauce.
- Rolling Your Sushi
- Lay out your seaweed sheets (nori) on a bamboo sushi mat. Ensure the rough side is facing up.
- Spread the rice evenly across the sheet, leaving about half an inch of space at the top. The rice should cover the entire sheet except for the top edge.
- Arrange your prepared fillings across the center of the rice.
- Carefully roll the sushi, applying gentle pressure. Seal the edge by wetting it with a little water.
- Cutting the Sushi
- Once rolled, use a sharp knife (dipped in water to prevent sticking) to slice your sushi into bite-sized pieces. Clean the knife between cuts for clean slices.
Pro Tips:
- If you’re craving extra flavor without adding sodium, a sprinkle of sesame seeds on the rice can add a nutty taste without the salt.
- Experiment with different fillings like cooked shrimp, mango, or zucchini for variety.
- If you’re craving a dip, mix a bit of low-sodium soy sauce with a teaspoon of rice vinegar or use a small amount of wasabi for a bit of heat.
Enjoy your fresh, flavorful, and low-sodium sushi made right at home! The beauty of this recipe is that it’s highly customizable, so you can mix and match ingredients based on what you have on hand or your dietary preferences. Happy rolling!
Pro Tips and Variations for Low Sodium Sushi
Making low sodium sushi is fun and flexible, and there are plenty of ways to elevate the experience while staying healthy! Here are a few tips and variations to customize your rolls and add extra flair:
1. Enhance the Rice Flavor
- Add a touch of sweetness: If you like your sushi rice a little sweeter, try adding a small amount of honey or agave nectar instead of sugar. This keeps it natural while still providing that slight sweetness you crave.
- Infuse with herbs: For an aromatic twist, infuse your rice with fresh herbs like basil or mint before cooking. The herbs add fragrance and a unique flavor without extra sodium.
2. Experiment with Fillings
- Try different vegetables: If you want a more vibrant roll, incorporate colorful veggies like bell peppers, spinach, or radishes for a crunchy texture and a burst of flavor.
- Switch up the protein: Instead of chicken or tofu, you can use low-sodium crab meat or cooked shrimp for a seafood-inspired roll. If you’re feeling creative, try grilled portobello mushrooms for a hearty vegetarian option.
3. Add a Touch of Spice
- Low sodium chili sauce: For a little heat, drizzle some low-sodium sriracha sauce on top of your roll. This adds spice without the high sodium content found in regular sauces.
- Pickled ginger: Serve your sushi with a side of pickled ginger (unsweetened and low-sodium) to enhance the flavors and provide a refreshing contrast.
4. Make a Low-Sodium Sushi Bowl
- If you’re not into rolling, transform your sushi into a deconstructed sushi bowl! Layer your rice with fresh vegetables, protein, and a light drizzle of low-sodium soy sauce or rice vinegar. It’s an easy and customizable alternative to traditional sushi rolls.
5. Healthy Sauces
- Traditional dipping sauces can be high in sodium, but you can make your own! Combine a splash of rice vinegar, low-sodium soy sauce, and a few drops of sesame oil for a light, savory dip. Add a sprinkle of sesame seeds for an extra flavor boost.
Simple Substitutions:
- Instead of using regular soy sauce, try coconut aminos or low-sodium tamari for an umami-rich taste with less sodium.
- For a fun and unique twist, top your sushi with avocado slices or a mango drizzle to add creaminess and natural sweetness.
Serving Suggestions for Low Sodium Sushi
Now that you’ve prepared your delicious low-sodium sushi, it’s time to think about how to serve it! The right presentation and side dishes can elevate the entire meal experience, making it both satisfying and exciting. Here are some serving suggestions that will not only make your sushi shine but also keep your meal healthy and balanced:
1. Serve with Fresh Pickled Ginger
- Pickled ginger is a classic sushi accompaniment that helps cleanse the palate between bites. To keep it low sodium, look for pickled ginger that’s free of added salt or make your own at home using rice vinegar and a little honey. It adds a refreshing, tangy contrast to the rich flavors of the sushi rolls.
2. Pair with Low-Sodium Miso Soup
- Miso soup is a fantastic, warm side dish to enjoy with your sushi. Use a low-sodium miso paste to keep the sodium content in check while still enjoying the rich umami flavor. Add in some tofu, seaweed, and green onions for extra texture and nutrition.
3. Accompany with a Light Asian Salad
- A simple Asian slaw made from shredded cabbage, carrots, and a light sesame dressing can provide a crisp, refreshing contrast to the sushi. If you want to boost the nutrition, toss in some edamame or cucumber for extra crunch.
- Alternatively, a cucumber salad with rice vinegar, a pinch of sesame seeds, and a dash of low-sodium soy sauce pairs wonderfully with the sushi, bringing lightness to the meal.
4. Add a Healthy Serving of Avocado
- Sliced avocado can be a perfect topping or side for your sushi rolls. Not only does it add a creamy texture, but it also enhances the healthy fats in the meal. You can serve avocado on the side or place a thin slice directly on your sushi rolls for added richness.
5. Serve with a Light Wasabi Dip
- While wasabi is traditionally served with sushi, many commercial versions are packed with sodium. For a healthier alternative, mix low-sodium soy sauce with a small amount of wasabi paste for a flavorful dip that complements the sushi’s light, fresh ingredients.
6. Beverage Pairings
- For a complete sushi experience, consider serving your low-sodium sushi with a chilled glass of green tea. It’s rich in antioxidants and has a subtle flavor that won’t overwhelm your meal. Alternatively, you can opt for sparkling water with a twist of lemon or lime to refresh your palate.
Garnishing Your Sushi:
Don’t forget the finishing touches! Garnish your sushi with a sprinkle of sesame seeds or scallions for extra texture and flavor. A few drops of lemon or lime juice can bring a zesty freshness that balances the rich, savory flavors of the fish and rice.
By presenting your low-sodium sushi with these tasty and health-conscious side dishes and garnishes, you can create an entire meal that’s visually appealing and perfectly balanced. Enjoy your sushi experience with these creative serving ideas!
Conclusion: Enjoy Your Low Sodium Sushi!
Congratulations! You’ve just mastered the art of making low sodium sushi that’s both delicious and healthy. Whether you’re preparing a simple meal for yourself or impressing friends at a dinner party, this recipe is versatile and full of fresh, vibrant flavors.
By using low-sodium ingredients and focusing on fresh, natural flavors, you’ve created a dish that not only tastes great but is also better for your health. It’s a wonderful way to enjoy sushi without the excessive sodium found in traditional versions. The combinations of fresh fish, vegetables, and vinegar-seasoned rice all come together in a perfect balance of taste and texture.
Tips for Enjoying Your Low Sodium Sushi:
- Feel free to get creative with the ingredients! Swap in your favorite vegetables or add fruits like mango for a tropical twist.
- Experiment with different types of sushi rolls – the possibilities are endless, from veggie rolls to tuna rolls or even salmon avocado rolls.
- If you’re making sushi for a crowd, consider setting up a DIY sushi station where everyone can build their own rolls, making it a fun and interactive experience.
Low-sodium sushi is a fantastic choice for anyone looking to cut back on salt without sacrificing flavor. It’s perfect for those with dietary restrictions or anyone who simply wants to enjoy sushi in a healthier way.
Enjoy your creation, and remember – sushi is all about fresh ingredients, creativity, and having fun while cooking!
If you’ve enjoyed making this low-sodium sushi, be sure to explore other healthy sushi meal recipes that are equally satisfying and delicious. Happy cooking!
FAQs: Your Low Sodium Sushi Questions Answered
Making low sodium sushi at home can be a fun and rewarding experience, but we know you might have a few questions along the way. Here are answers to some frequently asked questions to help you make the most of your sushi-making journey!
1. Can I use regular soy sauce instead of low-sodium soy sauce?
2. What fish is best for making sushi?
3. How do I prevent the sushi rice from being too sticky?
4. Can I make sushi rolls ahead of time?
5. What are some great low-sodium fillings for sushi?
6. Can I make low-sodium sushi without fish?
7. Can I freeze sushi?
Making low sodium sushi doesn’t have to be intimidating! With the right ingredients and a little practice, you can create tasty, healthier sushi that fits your dietary needs. If you have more questions, feel free to ask in the comments below! Happy sushi-making!