
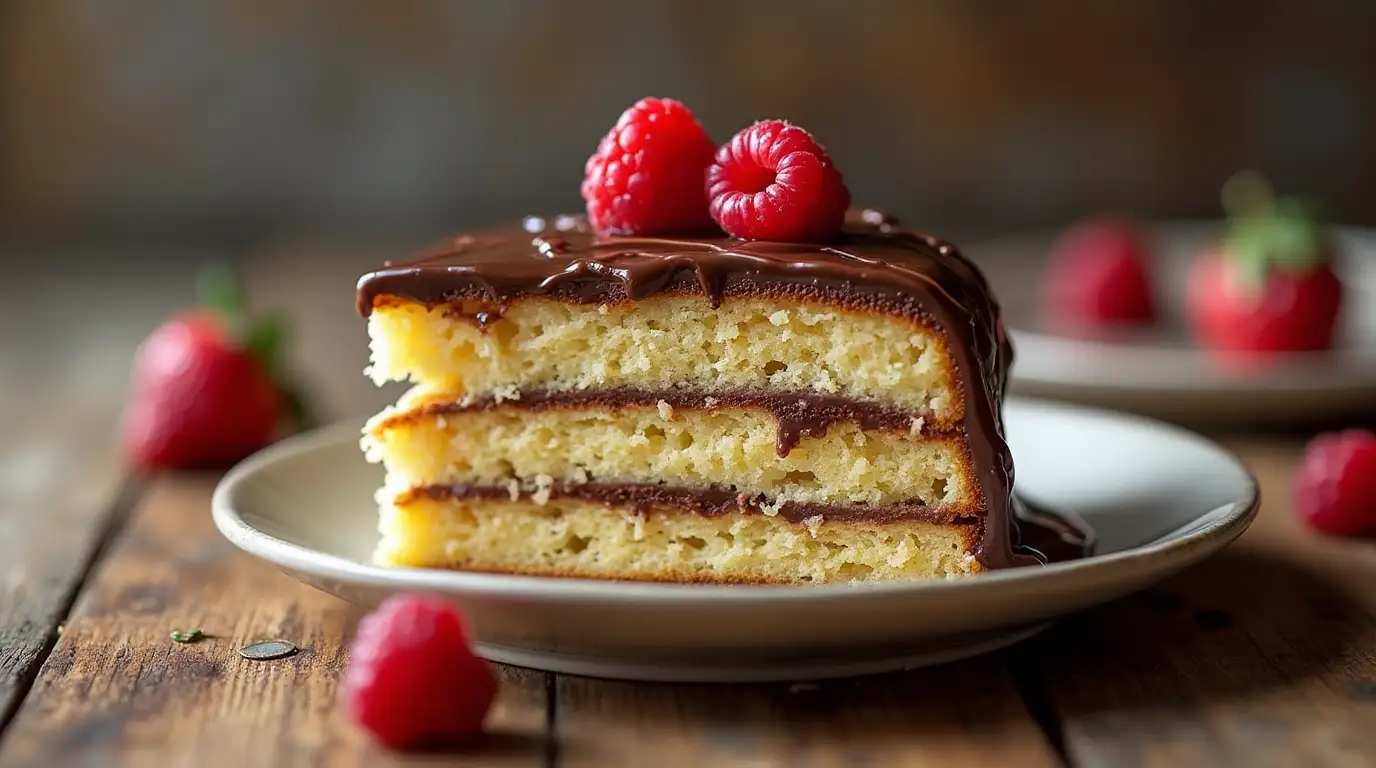
Who can resist the timeless combination of moist vanilla cake and rich chocolate frosting? Whether you’re celebrating a special occasion or simply craving a homemade treat, this fluffy vanilla cake with chocolate icing is the perfect indulgence. With its buttery, tender crumb and silky-smooth chocolate topping, every bite is pure bliss.
Have you ever struggled to bake a soft, bakery-style vanilla cake at home? Don’t worry—I’ll guide you through easy, foolproof steps to ensure your cake turns out light, airy, and deliciously decadent. Plus, I’ll share pro tips and variations so you can customize it to your liking. Let’s get baking!
Key Benefits of This Vanilla Cake with Chocolate Recipe
Baking your own vanilla cake with chocolate isn’t just about dessert—it’s an experience that fills your home with warmth and delight. Here are some key benefits that make this recipe a must-try:
- Decadent Flavor Duo: Enjoy the perfect harmony of a light, fluffy vanilla cake paired with a rich, velvety chocolate topping.
- Versatility for Any Occasion: Whether it’s a casual family treat or a special celebration, this dessert easily adapts to every event.
- User-Friendly Process: With clear, step-by-step instructions, even novice bakers can create a stunning, professional-quality cake.
- Customizable Options: Feel free to experiment with variations—add a chocolate ganache, sprinkle a pinch of sea salt, or use different types of chocolate to suit your taste.
- Budget-Friendly Gourmet: Delight in a luxurious dessert experience using simple, everyday ingredients that won’t break the bank.
- Satisfying Homemade Touch: Experience the joy and pride of creating a delicious, homemade treat that brings smiles to every table.
Every tip and trick shared here is designed to help you achieve the perfect balance of taste and texture, ensuring that your baking journey is as enjoyable as the final result.
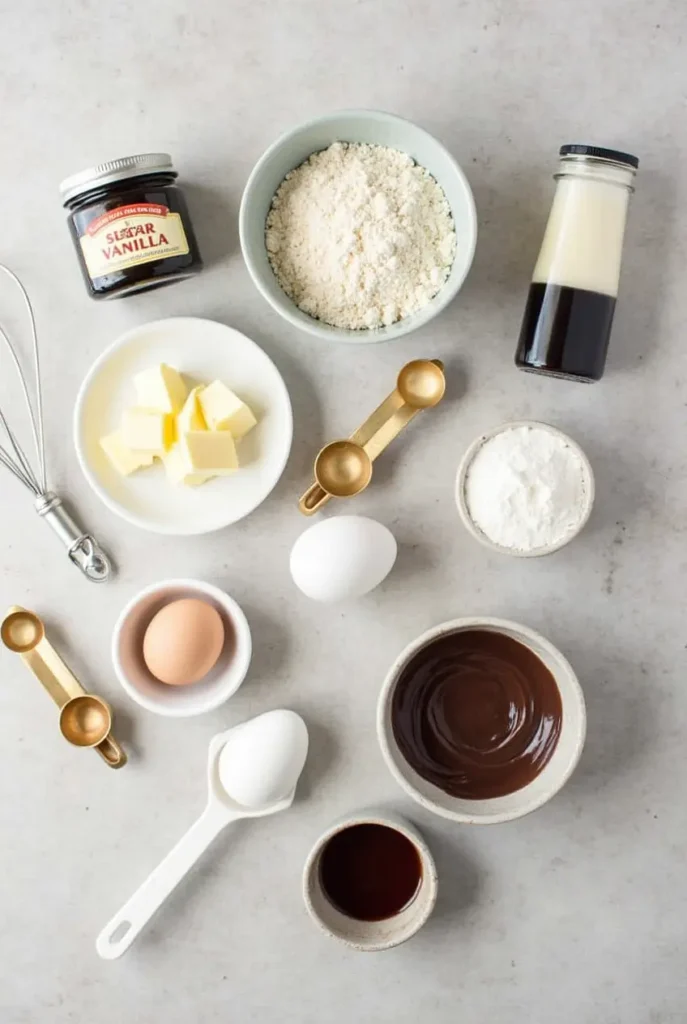
Ingredients for Vanilla Cake with Chocolate
Before we dive into the baking process, let’s gather all the ingredients you’ll need. Using high-quality, fresh ingredients ensures your cake turns out perfectly soft, moist, and flavorful.
For the Vanilla Cake:
- 2 ½ cups all-purpose flour – Provides structure and a tender crumb.
- 2 ½ tsp baking powder – Helps the cake rise beautifully.
- ½ tsp salt – Enhances flavor and balances sweetness.
- 1 cup unsalted butter, softened – Creates a rich, buttery texture.
- 1 ¾ cups granulated sugar – Adds the perfect level of sweetness.
- 4 large eggs, room temperature – Ensures a light and fluffy texture.
- 1 tbsp pure vanilla extract – Infuses warm, aromatic vanilla flavor.
- 1 cup whole milk – Adds moisture and richness to the batter.
For the Chocolate Topping:
- 1 cup semi-sweet chocolate chips – Delivers deep, rich chocolate flavor.
- ½ cup heavy cream – Creates a smooth and luscious consistency.
- 2 tbsp unsalted butter – Adds silkiness and a glossy finish.
- 1 tbsp powdered sugar (optional) – Slightly sweetens the topping.
Why These Ingredients Matter:
- Using room temperature eggs and butter ensures even mixing and a smoother batter.
- Whole milk enhances the cake’s softness, but you can substitute it with buttermilk for extra moisture.
- A combination of semi-sweet chocolate and heavy cream creates a luxurious chocolate glaze that complements the delicate vanilla flavor.
Now that we have everything ready, let’s move on to the step-by-step process of bringing this delicious cake to life!
How to Make the Perfect Vanilla Cake with Chocolate Ganache
Let’s dive into the delicious process of making a fluffy vanilla cake topped with a decadent chocolate ganache. Follow these easy steps, and you’ll have a beautiful cake that’s sure to impress.

Step 1: Preheat Oven and Prepare Pans
- Preheat your oven to 350°F (175°C) to ensure an even baking temperature.
- Prepare two 8-inch round cake pans by greasing them lightly and dusting with flour, or use parchment paper to line the pans. This prevents sticking and ensures your cake comes out easily.
Step 2: Combine Dry Ingredients
- In a medium-sized bowl, mix together the flour, baking powder, and a pinch of salt. This creates a smooth and even base for your cake batter.
Step 3: Cream Butter and Sugar Together
- In a large mixing bowl, use an electric mixer to beat the unsalted butter and sugar until light and fluffy. This process is important for giving your cake a soft and airy texture. It should take around 2-3 minutes.
Step 4: Incorporate Eggs and Vanilla
- Add the eggs one by one, ensuring you mix each egg well into the batter before adding the next. This will help create an even texture.
- Stir in the vanilla extract, which will give the cake a rich and aromatic flavor that enhances its natural sweetness.
Step 5: Alternate Wet and Dry Ingredients
- Gradually add the flour mixture, alternating with the whole milk, starting and ending with the dry ingredients. Be careful not to overmix, as this can make the cake dense. Just mix until everything is combined for a light, fluffy batter.
Step 6: Bake the Cake
- Pour the cake batter evenly into the prepared pans, smoothing the tops with a spatula for even layers.
- Bake for 30-35 minutes, or until a toothpick inserted into the center comes out clean. Be patient and don’t open the oven door too soon to prevent the cake from sinking.
- Allow the cakes to cool in the pans for 10 minutes, then transfer them to a wire rack to cool completely before adding the ganache.
Step 7: Make the Chocolate Ganache
- In a small saucepan, gently heat the heavy cream over low heat until it begins to simmer, but don’t let it come to a full boil.
- Pour the hot cream over the chocolate chips in a bowl. Let the mixture sit for a couple of minutes to melt the chocolate. Stir until smooth and glossy.
- If you like a sweeter ganache, add a bit of powdered sugar to taste, and mix in butter for extra richness and shine.
Step 8: Assemble and Decorate
- Place one of the cake layers on your serving plate and spread a generous layer of the chocolate ganache on top.
- Place the second layer of cake on top, then pour the remaining ganache over the entire cake, allowing it to gently drip down the sides.
- Let the ganache set for about 15 minutes before cutting into your beautiful creation.
Your homemade vanilla cake with chocolate ganache is now ready to serve—rich, moist, and utterly delicious!
Pro Tips and Variations for the Perfect Vanilla Cake with Chocolate Ganache
Creating the perfect vanilla cake with chocolate ganache is simple, but a few extra tips and variations can take your dessert from great to absolutely irresistible. Let’s dive into some expert advice to help you master this recipe and even add your own spin!
1. Use Room Temperature Ingredients
For the best texture, make sure your butter, eggs, and milk are at room temperature before mixing. Cold ingredients can cause the batter to seize up and result in a dense, uneven cake. Allow them to sit out for 20-30 minutes before starting your recipe.
2. Don’t Overmix the Batter
Once the wet and dry ingredients are combined, mix until just incorporated. Overmixing can lead to a tough cake. It’s tempting to keep stirring, but gentle mixing will keep your cake soft and fluffy.
3. Check Your Oven Temperature
Ovens can often run hotter or cooler than their set temperature. Invest in an oven thermometer to ensure accurate temperature and prevent under or overbaking your cake. This is especially crucial for delicate cakes like vanilla sponge.
4. Use High-Quality Chocolate for the Ganache
The chocolate in your ganache makes a huge difference in flavor. Opt for semi-sweet or dark chocolate with a high cocoa content (around 60-70%). This creates a rich and velvety ganache that balances perfectly with the sweet cake.
5. Customize Your Ganache
If you love a darker, more intense chocolate flavor, consider using bittersweet or unsweetened chocolate in your ganache. Alternatively, for a lighter, sweeter topping, add more powdered sugar or even a splash of vanilla extract to enhance the flavor.
6. Make It Gluten-Free
If you need a gluten-free option, you can swap the all-purpose flour with a gluten-free flour blend. Make sure it’s a blend designed for cakes to ensure a light texture. You may need to adjust the baking time slightly, so keep an eye on your cake while it bakes.
7. Add Layers for Extra Decadence
For an extra indulgent dessert, consider making a three-layer cake. Simply double the recipe and bake three 8-inch rounds. This gives the cake a more luxurious look and adds more surface area for that rich chocolate ganache.
8. Experiment with Fillings
While this vanilla cake is amazing on its own, you can also add a filling between the layers. Consider a fruit compote, whipped cream, or even a caramel filling for an added touch of sweetness and flavor.
9. Chill Your Ganache for a Thicker Texture
If you prefer a thicker ganache to spread easily, chill it in the fridge for about 10-15 minutes. This will allow it to firm up, making it perfect for spreading between layers or using as a thicker frosting on top.
10. Store Your Cake Properly
To keep your cake fresh, store it in an airtight container at room temperature for up to 3-4 days. If you want to store it longer, you can freeze the cake layers before frosting for up to 3 months. Let the layers thaw before frosting and serving.
Serving Suggestions for Your Vanilla Cake with Chocolate Ganache
Once your vanilla cake with chocolate ganache is ready, it’s time to make it even more special by pairing it with delicious sides or presenting it in creative ways. Here are some fun and tasty serving ideas that will elevate your dessert to a whole new level!
1. Serve with Fresh Berries
Pair your rich vanilla and chocolate cake with some fresh berries like strawberries, raspberries, or blueberries. The slight acidity and sweetness of the berries will perfectly complement the richness of the cake, creating a balanced and refreshing bite.
2. Add a Scoop of Ice Cream
For an indulgent treat, serve a slice of cake with a scoop of vanilla ice cream or even chocolate ice cream. The cold, creamy ice cream paired with the warm cake will give your dessert an irresistible contrast in texture and temperature.
3. Top with Whipped Cream
If you’re looking for a light and airy topping, add a dollop of whipped cream. You can make it even more luxurious by infusing the whipped cream with a splash of vanilla extract or amaretto liqueur for a unique flavor twist.
4. Create a Layered Cake Plate
For a show-stopping presentation, cut the cake into layered slices and arrange them in a stacked formation on the plate. You can drizzle the chocolate ganache in between each layer for an extra touch of decadence.
5. Dust with Powdered Sugar
To add a touch of elegance, lightly dust the top of the cake with powdered sugar before serving. It gives the cake a polished, delicate look and adds a subtle sweetness to the surface.
6. Pair with Hot Beverages
This cake pairs beautifully with a hot beverage like coffee, tea, or even a rich hot chocolate. The warmth of your drink will bring out the deep flavors in the cake and ganache, creating a comforting experience.
7. Create a Cake Buffet
For special occasions or parties, consider making several smaller versions of this cake and serving them alongside other mini cakes or cupcakes. You can even set up a cake bar with a variety of toppings like sprinkles, shaved chocolate, and edible flowers.
8. Garnish with Mint Leaves
For a burst of color and freshness, garnish each serving with a few fresh mint leaves. The cool mint will enhance the overall flavor profile, adding an herbaceous note that contrasts beautifully with the sweet, rich cake.
9. Serve with Caramel Sauce
For those who love an extra touch of sweetness, serve the cake with a drizzle of warm caramel sauce. The buttery sweetness of caramel pairs perfectly with the vanilla and chocolate, adding depth and complexity to your dessert.
Conclusion: Why You’ll Love This Vanilla Cake with Chocolate Ganache
There’s something magical about the combination of a light, fluffy vanilla cake and the rich, velvety goodness of chocolate ganache. Whether you’re celebrating a special occasion or simply indulging in a homemade treat, this cake is sure to impress.
Why This Recipe Works
This vanilla cake recipe is the perfect balance of flavors and textures. The moist cake layers are made with simple, everyday ingredients that come together to create something extraordinary. Meanwhile, the chocolate ganache adds that luxurious, glossy finish that makes every slice look as good as it tastes.
With these easy-to-follow steps, you can create a bakery-quality dessert right in your own kitchen, and customize it to suit your tastes with the many variations and serving suggestions we’ve explored.
Why You Should Make It
Making this vanilla cake with chocolate ganache isn’t just about creating something delicious—it’s about sharing something special with your loved ones. Whether you’re hosting a birthday party, celebrating an anniversary, or just want a sweet treat to brighten your day, this cake is a crowd-pleaser that’s as visually stunning as it is satisfying.
Remember, baking is all about having fun and experimenting. So, feel free to try out the variations or add your own creative twist. Your family and friends will be asking for seconds, and you’ll be proud to serve them this homemade delight.
FAQs: Everything You Need to Know About Vanilla Cake with Chocolate Ganache
If you’re new to baking or have some questions about making this vanilla cake with chocolate ganache, don’t worry! I’ve gathered answers to some of the most common queries to help you out. Let’s dive into the FAQs!